Met's engineering skills always shine through her designs. CRAW hearts seem to be the norm, but here Met gives us a peyote version where the placement of beads creates the shape. I love a project that can be done fairly quickly which also provides some learning and can be made in different sizes. Thanks Met! Marcia
My Bead Love contribution is a sweet little open heart made with peyote stitch and two different bead sizes. Using size 11 and size 15 seed beads in carefully selected positions, stitches made with single beads or multiple beads and areas where you pass through beads without adding new ones creates these heart shaped earrings.
Supplies for a pair of earrings …
You will need size 11 and size 15 seed beads in the same color and finish.
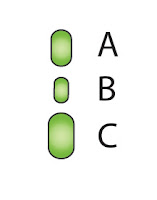 3 grams of size 11 seed beads (A)
1/2 gram of size 15 seed beads (B)
2 size 8 beads (C) Note: These are used to attach the split rings.
2 6mm split rings
2 ear wires
Beading thread One G, KO or Fireline 6lb.
Size 10 or 11 beading needle
Each earring measures 1" by 7/8" (2.5cm by 2.3cm) without the split ring and ear wire.
Here are the bead numbers used in the earrings …
Size 11 D4208 Duracoat Galvanized Berry
Size 15 D4208 Duracoat Galvanized Berry
Size 8 D4208 Duracoat Galvanized Berry
Tips for using the visual cues in the diagrams …
- The thread path is a bold red line starting at a little black dot and ending with a bold red arrow.
- The beads stitched in the step are outlined in bold red.
- The beads passed through (not added in the step) are outlined in bold black.
Pull a 3 and 1/2 foot (107 cm) length of thread.
Row 1 and 2: String 36A. Needle through the first 2 beads again in the same direction making a ring. Slide the ring of beads down the thread leaving a 1 and 1/2 foot (46 cm) tail thread. The tail thread will be used later.
With a medium tension …
Row 3: Using A, make 18 peyote stitches. Step up into the first bead stitched in this row.
Row 4:
- Without a bead, needle into the next high bead. This is a decrease area and defines the top center of the heart.
- Make 3 peyote stitches each with 2A.
- Make 5 peyote stitches each with 1A.
- Make 1 peyote stitch with 2A. This is the bottom of the heart.
- Make 5 peyote stitches each with 1A.
- Make 3 peyote stitches each with 2A.
- Pass the needle through the decrease at the top center of the heart.
- Step up into two beads (the first 2A).
- Make 1 peyote stitch with 1A needling into 2A’s.
- Make 1 peyote stitch with 1A needling into 2A’s.
- Make 3 peyote stitches each with 1A.
- Pass the needle through 6A (low/high). This positions the thread in the 1st of the 2 beads at the bottom of the heart.
- Pick up 1A and needle into the 2nd of the 2 beads at the bottom of the heart.
- Pass the needle through 6A (low/high).
- Make 2 peyote stitches each with 1A.
- Make 1 peyote stitch with 1A needling into 2A’s.
- Make 2 peyote stitches each with 1A needling into 2A’s.
- Without a bead, needle though 1 bead and the decrease area at the top of the heart.
- Step up into the 1st bead in the 2 bead pair.
Row 6:
- Make 1 peyote stitch with 1B and 1A.
- Make 1 peyote stitch with 2A and 1B.
- Make 1 peyote stitch with 2A and 1B.
- Make 1 peyote stitch with 1A and 1B.
- Make 1 peyote stitch with 1B. Note: Use a little tighter tension to help the size 15 seed bead fill the space and to hide the thread. The tighter tension will also encourage the heart to curve and have more dimensionality.
- Following the outside perimeter, needle through 8 beads (high/low). This positions the thread at the bottom tip.
- Following the outside perimeter, needle through 8 more beads (high/low).
- Make 1 peyote stitch with 1B. Note: Use a little tighter tension to help the size 15 seed bead fill the space and to hide the thread. The tighter tension will also encourage the heart to curve and have more dimensionality.
- Make 1 peyote stitch 1B and 1A.
- Make 1 peyote stitch with 1B and 2A.
- Make 1 peyote stitch with 1B and 2A.
- Make 1 peyote stitch with 1A and 1B needling into the 2nd bead of the 2 bead pair.
Adding the Size 8 bead for hanging the split ring
- Pass the needle through 1A, the decrease area, 1A, 1B and 1A. This positions the thread near the top on one side of the heart.
- Make 1 peyote stitch with 1C.
- Needle through the low/high beads around the outer perimeter to reinforce the stitching. Note: If you want the heart to have more dimensionality use a tighter tension while reinforcing these beads.
- Secure the thread and cut.
Do not cut the tail thread yet. It will be used next.
This row is worked on the inside perimeter of the heart with the tail thread.
Row 7:
- Needle through 8 beads (low/high).
- Make 3 peyote stitches each with 1B.
- Without a bead, needle into the next high bead. This is a decrease area and defines the inside point at the bottom of the heart.
- Make 3 peyote stitches each with 1B.
- Needle through 10 beads moving back toward the top of the heart.
- Make 1 peyote stitch with 2A.
- Reinforce the inside perimeter by needling through the 34 low/high beads until you get back to the inside top of the heart. This positions the thread in the 1st bead of the 2 bead pair at the inside top of the heart.
- Make 1 peyote stitch with 1A into the 2nd bead of the 2 bead pair splitting the 2 bead pair.
Secure the tail thread and cut.
- Open a split ring and insert into the size 8 bead.
- Open the loop on an ear wire.
- Insert the split ring into the ear wires loop and close the loop on the ear wire.
Make a second earring.
Earlier in the year, I beaded Marcia's Love & Hope letters and put them together in a crossword. They decorate my bead studio color wall. Now, a small heart and two large hearts accompany Love & Hope! Here are instructions to make a large peyote heart.
Large Peyote Heart
Supplies needed for one large peyote heart …
You will need size 11 and size 15 seed beads in the same color and finish.
2 grams of size 11 seed beads (A)
1/2 gram of size 15 seed beads (B)
Beading thread One G, KO or Fireline 6lb.
Size 10 or 11 beading needle
The large heart measures 1 1/8" by 1 1/2" (3cm by 3.8cm).
Here are the bead numbers used in the blue hearts accompanying Marcia’s Love and Hope letters…
Size 11 F463Z
Size 15 F463Z
and the teal heart accompanying Marcia’s Love & Hope letters …
Size 11 377I
Size 15 377I
Pull a 4 foot (122 cm) length of thread.
Row 1 and 2: String 44A. Needle through the first 2 beads again in the same direction making a ring. Slide the ring of beads down the thread leaving a 1 and 1/2 feet (46 cm) tail thread. The tail thread will be used later.
With a medium tension …
Row 3: Using A, make 22 peyote stitches. Step up into the first bead stitched in this row.
Row 4:
- Without a bead, needle into the next high bead. This is a decrease area and defines the top center of the heart.
- Make 5 peyote stitches each with 2A.
- Make 5 peyote stitches each with 1A.
- Make 1 peyote stitch with 2A. This is the bottom of the heart.
- Make 5 peyote stitches each with 1A.
- Make 5 peyote stitches each with 2A.
- Pass the needle through the decrease at the top center of the heart.
- Step up into two beads (the first 2A).
Row 5:
- Make 4 peyote stitch with 1A needling into 2A’s.
- Make 3 peyote stitch each with 1A.
- Pass the needle through 6A (low/high). This positions the thread in the 1st of the 2 beads at the bottom of the heart.
- Pick up 1A and needle into the 2nd of the 2 beads at the bottom of the heart.
- Pass the needle through 6A (low/high).
- Make 2 peyote stitches each with 1A.
- Make 1 peyote stitch with 1A needling into 2A’s.
- Make 4 peyote stitches each with 1A needling into 2A’s.
- Without a bead, needle though 1 bead and the decrease area at the top of the heart.
- Step up into the 1st bead in the 2 bead pair.
Row 6:
- Make 1 peyote stitch with 1B and 1A.
- Make 1 peyote stitch with 2A and 1B.
- Make 1 peyote stitch with 2A and 1B.
- Make 1 peyote stitch with 2A and 1B.
- Make 1 peyote stitch with 1A and 1B.
- Make 1 peyote stitch with 1B. Note: Use a little tighter tension to help the size 15 seed bead fill the space and to hide the thread.
- Following the outside perimeter, needle through 10 beads (high/low). This positions the thread at the bottom tip.
- Following the outside perimeter, needle through 10 more beads (high/low).
- Make 1 peyote stitch with 1B. Note: Use a little tighter tension to help the size 15 seed bead fill the space and to hide the thread.
- Make 1 peyote stitch 1B and 1A.
- Make 3 peyote stitch with 1B and 2A.
- Make 1 peyote stitch with 1A and 1B needling into the 2nd bead of the 2 bead pair.
Secure the thread and cut.
This row is worked on the inside perimeter of the heart with the tail thread.
Row 7:
- Needle through 10 beads (low/high).
- Make 4 peyote stitches each with 1B.
- Without a bead, needle into the next high bead. This is a decrease area and defines the inside point at the bottom of the heart.
- Make 4 peyote stitches each with 1B.
- Needle through 12 beads moving back toward the top of the heart.
- Make 1 peyote stitch with 2A.
- Reinforce the inside perimeter by needling through the 42 (low/high) beads until you get back to the inside top of the heart. This positions the thread in the 1st bead of the 2 bead pair at the inside top of the heart.
- Make 1 peyote stitch with 1A into the 2nd bead of the 2 bead pair splitting the 2 bead pair.
Secure the thread and cut.
For a printable version click here.
Thank you for beading my little peyote heart earrings! I hope you enjoyed the design and enjoy wearing the earrings. Met
met@metbeads.com
www.metbeads.com


