Sunday, February 12, 2017

The E in Love - by Marcia DeCoster

Once again so many beautiful letters I just had to share them all with you!  Each one is so unique and the coloration and embellishments are wonderful.   We have garden themes, and little mice and owls, grapes, and stripes, so much imagination present.  I thank you all for participating.  It's been so fun.  I hope you continue to enjoy the love letters.

Once again, if we missed your E we apologize, we did our best to find them all!

Last weeks post gave a few ideas for using them but I've seen some really creative applications on Facebook posts.  Perhaps we'll post a few favorites in the weeks to come, so keep posting your finished love letters.  We'll also be putting together a video collage with the photos of all four of the love letters together, so stay tuned for that, it's a lot of LOVE!

Our first E belongs to Wendy Heitzman who volunteered to collect all your V's and then all your E''s and photo edited them to be a consistent size making it easy to collage them.  Thanks for all the help Wendy!  Wendy's colors were all beautiful, but I absolutely love this one with the grapes!


It's also worth a note that Becs Dean-Skinner has completed a bunch of letters.  In the collage below you can see the difference between in E done in Toho beads on the left and Miyuki on the right.  Thanks for that experiment Becs!


We have lot's of love planned for Tuesday so please come back and join us!

Content by Marcia DeCoster


Tuesday, February 7, 2017

What will you do with your L.O.V.E. Letters? by Marcia DeCoster

Now that you've all four letters to spell LOVE and the addition of an  H and P to spell HOPE, what will  you do with your letters?

I've seen so many incredibly beautiful, colorful, creative, whimsical letters posted and so many good ideas for using them.

I've put together a few photos of ideas I've had.

Certainly a wall hanging comes to mind.

This one is a small 4 x 6 canvas from the local art store.  I painted it with some acrylics, drilled two holes and threaded through a ribbon.  My letters are stuck on with museum gel for a quick photo op, but terrifically tacky tape would work and is archival so will not damage your beadwork.

What you don't know is my second grand daughter's middle name is LOVE and her sisters middle name is JOY, so I have the perfect room decorations for them.


Another wall hanging, first I affixed the letters to hanging tags and strung a small ribbon through the hole.  The hanger is a chair finial from a woodworking store that I beaded around.  When I get around to finishing this I will likely bead some small loops on the underneath of the beaded finial for attachments points.


 Granted if you're going to use a letter for a pendant or a monogram you  might want one that has some relevance to you.  E could stand for lots of things besides the first letter of a name.  Make up something mysterious and wear it proudly!  I just added a small bail and a nice chunky chain.  You could of course bead a strap.


If you like to set a fancy table, napkin rings might be fun.  Dinner for 4, each could have one letter of LOVE, dinner for 8, LOVE and HOPE.


This next set of ideas are not with the beaded letters themselves but with graphics you create with those letters.  Lot's and Lot's of things you could do here.....Note cards, bookmarks, gift tags, business cards.

Here the lovebeadlove.blogspot.com business cards are doing double duty as a gift tag.  You might choose to photo your own wonderful letters and have some cards made to share the love.  I use overnight prints.com and have been happy with their quality and pricing but there are a lot of companies out there.


Another gift tag!  They're very fun!


Here are Wendy Heitzman's letters done up as a bookmark.  I used card stock, hole punched the top and threaded some ribbon through a fancy bead I had.  You might also laminate it to make it a bit more sturdy.


While we're on the subject of bookmarks, Cynthia Newcomer Daniel took a large rubber band and affixed her letter with a jump ring to create another kind of bookmark.


Cyn Bicker printed the LOVE image on fabric and created these adorable project bags!


And in what is possibly the ultimate purse fob, Helena Tang Lim strung her elegant gold and silver love letters on a purse!


I've seen many other wonderful ideas from those who have participated in making the love letters.  As time allows I'll share some more photos on the blog.

So I've presented a few ideas, but I know you'll come up with many more.  Join us next week when we'll be celebrating more love with some wonderful projects from our members.  

A sincere thank you for joining me in sharing the love of the love letters.  I've been asked several times if this may be taught in stores, on retreats, at bead societies or in your own bead circle.  My answer is YES please!  Spread the love.

Here is a delightful coloring book I found that inspired the shaping of the letters.  The pages are cardstock and perforated.  The letters are repeated so you can color them and remove them from the book to use as you like.  Personally I just like to look at the pretty shapes.


Blog content by Marcia DeCoster

SaveSave

Tuesday, January 31, 2017

Now we spell LOVE- Letter E by Marcia DeCoster

The final in the four letters you'll need to bead love!

Quick note, many of you are posting your LOVE letters on Facebook and we've  been collecting them up and adding them to collages.  Please do us a favor and post a photo of your E and your LOVE separately.  This gives us less editing work to do so that we can share everyone's beautiful letters with you.  Please try not to include distracting backgrounds or text.  Thank you!

If you've already beaded L, O and V the E will be super easy.  Basically it is the same as L with both a bottom and a top.  The mid-point has 2 cubes, one cube wide.  The letter was purposely designed with an odd number of rows so there would be a mid-point.


Notes: If this is your first letter, you may want to check back on the L post here to see what I say about thread.  Basically I am a double waxed fireline girl because I think it gives the best results in this design.

Supplies:  You'll need small amounts of a main color in size 11º and an even smaller amount for the serif.  Some size 15ºs will come in handy for adding the embellishments.  Make a nice collection of some O beads, 3 and 4 mm crystals, pearls, or fire polish, a few crystal sequins if you have them and whatever else strikes your fancy.

If you're not familiar with CRAW this video from Heather Collin is a good one to watch.  To be successful with the letters you should have a pretty good grasp of cubic right angle weave.  In this project you will be weaving not only a cube on top of a cube but cubes next to cubes as well,  to make a column that is 2-cube wide.


CRAW: Pick up 4 size 11 beads and tie in a circle. These are the floor beads. Pick up 3 beads (side, ceiling and side beads) and pass through the floor bead you are exiting from the opposite side (this forms the first wall) and the next floor bead. Pick up 2 11’s and pass through the side bead from the first wall, the floor bead and the next floor bead (this forms the second wall). Repeat for the third wall, adding 2 beads. Pass through the last floor bead and the side bead from the first wall. Pick up 1 bead and pass through the side bead of the third wall, the floor bead, the side bead of the first wall and the ceiling bead of the first wall.


Make a second CRAW cube attached to the first one by repeating all of the steps above. The ceiling of the first cube will become the floor of the second cube. Turn the two cubes horizontal and weave to exit a ceiling bead on the left of the 2 cubes as shown. (This was previously a side bead, when the work is turned it becomes a ceiling bead of that cube and a floor bead of the cube about to be built.)


When weaving cubes side by side you will be weaving 7 walls. The interior wall between the two cubes is a shared wall. Begin by picking up 3 seed beads and passing through the ceiling you are exiting.


The illustrations below show how the face of the cube has side beads as well as a floor and ceiling. Use the arrows to see in what order to build the walls. See below for how many beads each wall should have.


Wall 1: 3 beads

Wall 2: 2 beads (side is shared with Wall 1)

Wall 3: 2 beads (side bead is shared with Wall 2)

Wall 4: 1 bead (Pass through the shared floor bead and up through the first bead of wall one. Pick up the one ceiling bead and pass through the side bead of wall 3, the shared floor bead again and then through the floor bead for wall 5)

Wall 5: 2 beads (side is shared with Wall 1)

Wall 6: 2 beads (side is shared with Wall 5)

Wall 7: 1 bead (Pass through the floor bead of 7 and the shared side bead from Wall 3. Pick up the one ceiling beading pass through the shared side bead from wall 6, the floor bead from wall 7 and up through shared side bead from Wall 3 and 7, shown as arrow 8 in the illustration)


.


With the work turned so that walls 3 and 7 are facing you, pass through the ceiling bead on the left. Repeat these steps an additional 11 times for a total of 13 rows of 2 cubes each.

Turn the work so the cubes you just finished are at the bottom and weave to exit an edge bead on the second row of cubes as shown. Build 4 rows, 2 cubes wide for the bottom of the E.

Weave up to the middle cube, 7th from the bottom.  Bead two cubes here. as shown  Weave up to the top of the E and weave 4 rows, 2 cubes wide the same as the bottom of the E.


Serifs: To add the serifs, in a contrasting size 11º weave to exit an edge bead. Pick up 3 size 11ºs and pass through the edge bead from the opposite side. Weave through a ceiling bead in that cube and pass through the corresponding edge bead on the back of the L. Repeat the 3 bead picot. Pass up through the first and second beads to exit the middle bead of the picot. Pass the thread through the middle picot bead on the front picot and back through the middle picot bead on the back. Weave to the edge bead for the next picot. If I have a lot of thread left I will pass the thread through the middle of the cubes up to the where the next picot needs to be placed.


If you need to stabilize the inside corners of the E you can run thread through the two edge beads on either side of the corners in both the front and the back.


Embellishments: Make yourself a pretty little pile of coordinated accent beads and choose a location on your letter to apply them. Use the working thread or weave in a new thread if necessary. Exiting a seed bead on the base of the letter, pick up an accent bead, a size 11º or 15º turning bead and pass back through the accent bead and an adjacent bead on the base. Repeat until you have a pleasing assortment of beads arranged on your letter.


And now for a a little surprise....I heard mentions more than once that perhaps HOPE would be a good word as well.  Well you have an O and an E and below I will give you some guidelines for creating an H and a P.


To create the H, use directions above to make two,   2 cube wide columns of 13 rows. Weave to exit and edge bead on the 7th row of one of the columns.  Bead 3 one cube wide rows and join to the 7th edge cube of the second column.  Add serifs and embellishments as you did for the LOVE letters.


For the P, use the directions above to make one, 2 cube wide column.  Weave to exit a floor bead on the top cube so that your first wall will be on the edge of the column. Make cubes as follows:  Note:  the first and all interior walls will be size 15's (aqua beads).  Make 4 cubes with 1 bead on each ceiling.  Make 3 cubes with 2 beads on the front and back face ceilings and 1 bead on the edge.  Make 3 cubes with 1 bead on each ceiling.  Join the last cube to the edge of the 5th cube from the top.  Add serifs and embellishments as you did for the love letters.


Struggling with the P?  Here is a little write up I did to help out. This is for the 3 cubes which have 2 ceiling beads on the front and back face.

Take it one cube and then one wall at a time. I try to think of picking up sides and ceilings where the front face and back face ceilings are the multiple beads. Start on the interior wall, which is the one with 15's. So Wall One, 3 size 15 beads = 1 side, 1 ceiling, 1 side. Wall Two (front face of the letter), 3 beads = 1 side and 2 ceilings. Wall Three (exterior edge of the letter), 2 beads = 1 side and 1 ceiling. Wall Four (back face of the letter) you only add the ceiling so only 2 beads. Just take it slow, one wall at a time starting with the interior wall of 3 size 15's and you should be able to see what is going on.

Stay tuned for next week where I'll have a few ideas of how to use your LOVE letters!


If you want to be sure to see new content, sign up for email delivery!  

Blogpost written by Marcia DeCoster

For a printable version click here.

Monday, January 30, 2017

Beautiful V's, third in the LOVE letters

Thanks to everyone who is following along and sharing their beautiful letters.  So much originality.

Tomorrow I'll publish E and a little surprise as well!  We look forward to seeing all the LOVE spelled out.

If you need to find the directions for any of the letters you can always click on the project tab at the top of the blog and you'll find a link to all the patterns.

Please forgive us if we missed your V, we do our very best.  Thanks this week to Wendy Heitzman for all the help collecting and cropping the V's for publication.


Tuesday, January 24, 2017

The Love Letters V by Marcia DeCoster

If you've been following along you may have an L and an O, if not and you'd like to, click on the letter and you'll find the directions.

The response has been fantastic and we are so pleased you are enjoying the LOVE.

To see a gallery of some of the O's we've seen posted, click here.

If you did an L you are familiar with two things....I like double waxed fireline and how to create two cubes side by side.  If not you might want to visit that post and see what I have to say.

Notes: What's a little different with the V is that on the interior wall of the beginning of each arm there are 2 beads to a side on the front and the back.  This forces the arms of the V into the slight slant that is necessary to create the V.

Supplies:  You'll need small amounts of a main color in size 11º and an even smaller amount for the serif.  Some size 15ºs will come in handy for adding the embellishments.  Make a nice collection of some O beads, 3 and 4 mm crystals, pearls, or fire polish, a few crystal sequins if you have them and whatever else strikes your fancy.
CRAW: Pickup 4 size 11 beads and tie in a circle. These are the floor beads. Pick up 3 beads (side, ceiling and side beads) and pass through the floor bead you are exiting from the opposite side (this forms the first wall) and the next floor bead. Pick up 2 11ºs and pass through the side bead from the first wall, the floor bead and the next floor bead (this forms the second wall). Repeat for the third wall, adding 2 beads. Pass through the last floor bead and the side bead from the first wall. Pick up 1 bead and pass through the side bead of the third wall, the floor bead, the side bead of the first wall and the ceiling bead of the first wall.


Bottom of the V: Make 3 additional CRAW cubes for a total of 4.  

Turn the 4 cubes horizontally and weave to exit the ceiling bead of the last cube on the right. (This was previously a side bead, when the work is turned it becomes a ceiling bead of that cube and a floor bead of the cube about to be built.)


Build the first arm: You will be working two cubes side by side on top of the left two cubes.  When weaving cubes side by side you will be weaving 7 walls. The interior wall between the two cubes is a shared wall. Begin by picking up 3 seed beads and passing through the ceiling you are exiting.


Use the illustration below to determine the order in which you will be building the walls.  


Note:  Very important, On the fifth and sixth walls you build, the sides will have 2 size 11º seed beads.  This will create a slight angle in the remaining rows that you weave.  You will only do this on the first set of cubes.  All other cubes are done with 1 bead for each floor, side, and ceiling.


Note:  The cube from the 4 cube start counts as row 1.  The cubes just built with the 2 side beads on the interior wall count as row 2.

Complete the first arm:  Bead an additional 11 2 cube rows as follows for a total of 13 cubes.

Wall 1: 3 beads

Wall 2: 2 beads (side is shared with Wall 1)

Wall 3: 2 beads (side bead is shared with Wall 2)

Wall 4: 1 bead (Pass through the shared floor bead and up through the first bead of wall one. Pick up the one ceiling bead and pass through the side bead of wall 3, the shared floor bead again and then through the floor bead for wall 5)

Wall 5: 2 beads (side is shared with Wall 1)

Wall 6: 2 beads (side is shared with Wall 5)

Wall 7: 1 bead (Pass through the floor bead of 7 and the shared side bead from Wall 3. Pick up the one ceiling beading pass through the shared side bead from wall 6, the floor bead from wall 7 and up through shared side bead from Wall 3 and 7, shown as arrow 8 in the illustration)

Build the second arm: Weave to exit the ceiling bead on the front face of the first horizontal row of cubes as shown.  You will be weaving rows one cube wide for the second arm.

Note:  As on the first arm, the first cube will have 2 beads as the side wall on the front and back interior edges.

Build an additional 11 cubes with 1 bead per floor, side and ceiling for a total of 13 cubes.


Note:  For simplicity sake I illustrate adding the serif embellishment all at once.  If it suits you, you may add them when your working thread is near to the correct placement before carrying on with the next step.


Embellishments: Make yourself a pretty little pile of coordinated accent beads and choose a location on your letter to apply them. Use the working thread or weave in a new thread if necessary. Exiting a seed bead on the base of the letter, pick up an accent bead, a size 11º or 15º turning bead and pass back through the accent bead and an adjacent bead on the base. Repeat until you have a pleasing assortment of beads arranged on your letter.


Note:  Since there is not much structure to the one cube arm, you may want to re-enforce that side of the V as much as possible.  You may also see that I added a little fire polish bead between the two base cubes to keep them together while still slanted.  Your results may vary, but be creative and re-enforce as necessary to get your V to behave.

Next week we'll complete the LOVE letters with an E!  What will you do with your LOVE letters?  Once we are done I will have a few ideas for you and don't forget, we have much more to look forward to with an entire schedule of other artists who will be contributing during the following weeks!


Blogpost written by Marcia DeCoster

For a printable version click here.


Monday, January 23, 2017

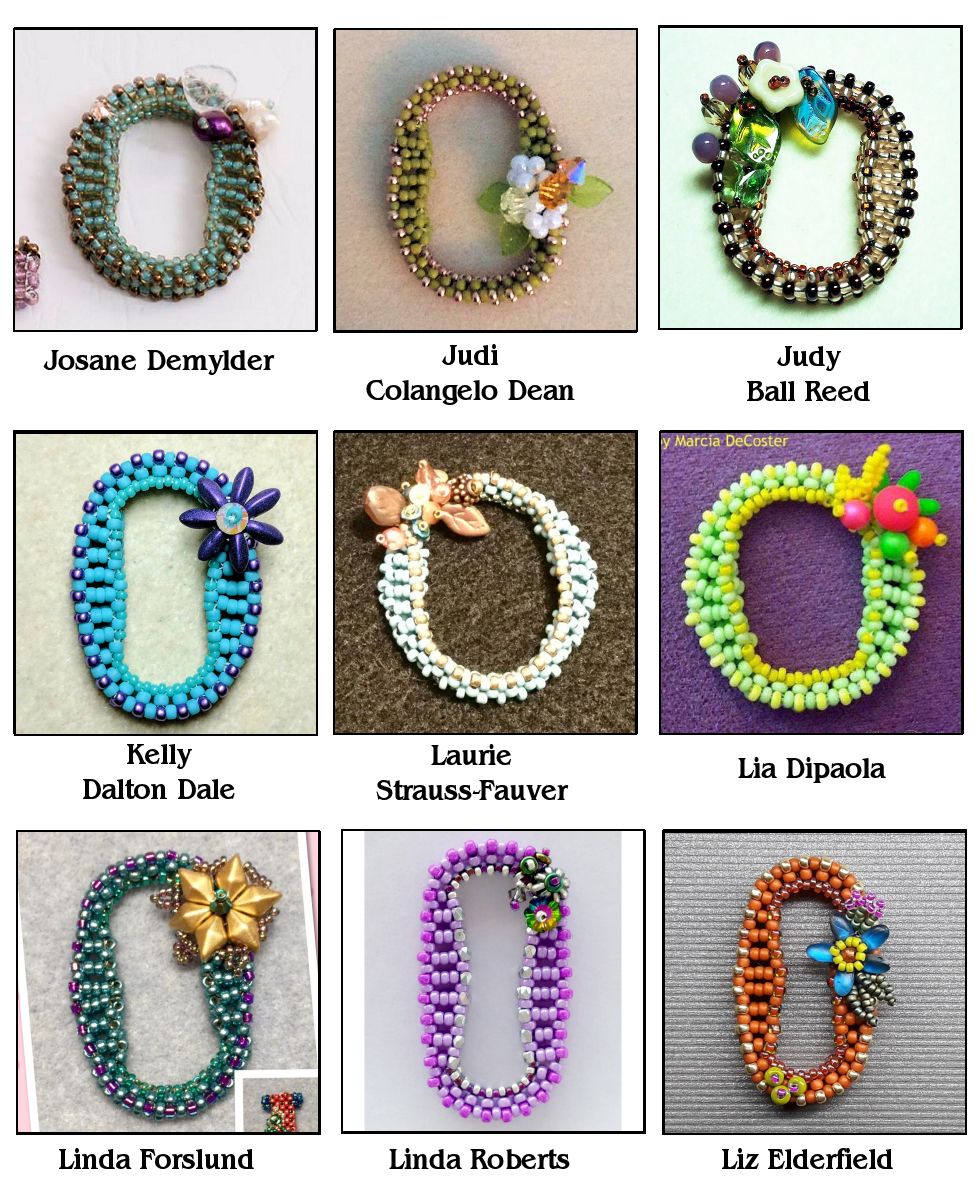
Oh my, so many O's

Once again there has been a fantastic response to the LOVE letters.  A big thanks to Beki Haley this week.  She collected all the O's and created the collages.

So much creativity.  I love that each person has brought their own excellent design sense to this project, and it shows!  Thanks so much for being here.

Tomorrow look for the V to carry on with the LOVE.  In the meantime we hope you enjoy O!


Content by Beki Haley